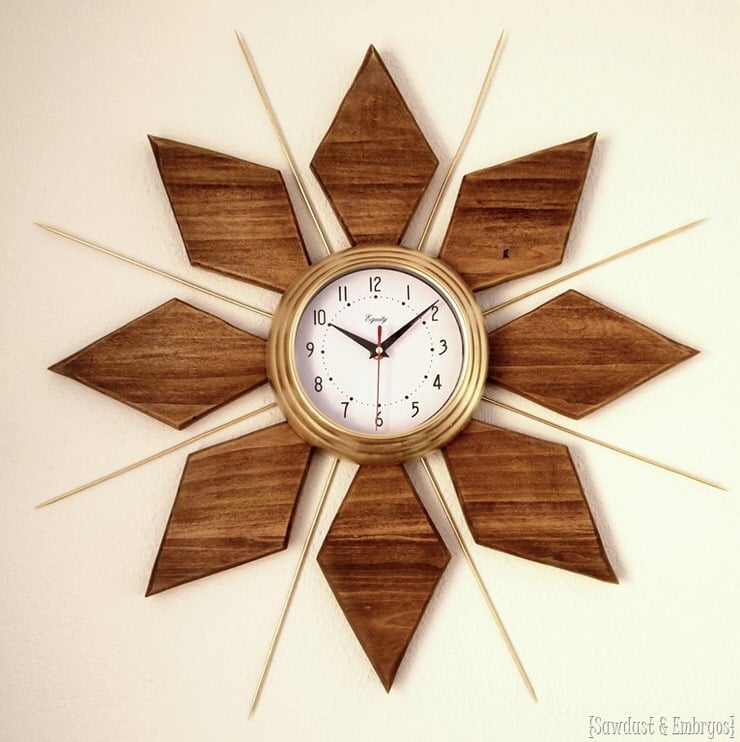
DIY Guide to Building a Wooden Wall Clock: Tick-Tock Your Way to a Unique Timepiece
Hey there, fellow crafters! Are you looking for a unique project that'll add a touch of rustic charm to your home? Look no further! Building a wooden wall clock is a surprisingly achievable project, even if you're a woodworking newbie. It's a fantastic way to personalize your space and show off your creative skills. Plus, imagine the satisfaction of glancing at a clock you built with your own two hands!
Don't worry, we'll walk through every step, from selecting the perfect wood to attaching the clock mechanism. So grab your tools, put on your favorite playlist, and let's get started!
Gathering Your Materials
First things first, you need to gather your materials. It's like prepping for a delicious meal - having everything ready will make the process smoother and more enjoyable.
Wood
The heart of your clock is the wood. Choose a wood that speaks to you! Here are some popular options:
- Pine: Affordable, lightweight, and easy to work with, making it perfect for beginners.
- Oak: Strong, durable, and adds a touch of elegance. Be prepared for its heavier weight.
- Walnut: Known for its beautiful grain patterns and rich color, adding a luxurious feel to your clock.
- Reclaimed wood: Adds a unique touch and is an eco-friendly option. Just make sure it's clean and stable before using.
Consider the size and shape you want for your clock. Do you want a classic round design, a modern square, or something more unique? The size of your wood will determine the overall size of your clock.
Clock Mechanism
This is the beating heart of your clock, the one responsible for keeping time. You'll need a clock mechanism that includes:
- Clock hands: Choose hands that complement the style of your wood and clock face.
- Movement: This is the internal mechanism that powers the clock. You can find quartz movements that run on batteries or spring-powered movements that need to be wound.
- Clock face: While optional, a pre-made clock face can make the process easier. You can also create your own using paint, stencils, or even woodburning techniques.
Tools
Now, for the tools to bring your vision to life:
- Saw: A circular saw or jigsaw will help you cut the wood to size.
- Sandpaper: This is essential for smoothing the wood and achieving a polished finish.
- Drill: You'll need this to create the hole for the clock mechanism.
- Screwdrivers: For attaching the clock mechanism and hands.
- Clamps: These are helpful for holding the wood securely during cutting and sanding.
- Measuring tape and pencil: For marking and measuring the wood accurately.
Building Your Clock
Okay, you've got your materials and tools - time to put your crafting hat on! Follow these steps to build your wooden wall clock.
1. Cut the Wood
Measure and mark your wood according to your chosen clock design. Use your saw to cut the wood carefully. For a circular clock, consider using a compass or a template to ensure a smooth circle.
2. Sanding is Key
After cutting, smooth out any rough edges and inconsistencies with sandpaper. Start with coarser grits to remove any major imperfections and finish with finer grits to achieve a smooth, polished surface.
3. Creating the Clock Face
You've got two options here:
- Pre-made clock face: This is a great option for a quick and easy approach. Choose a face that matches your wood and clock hands.
- DIY clock face: Unleash your inner artist! You can paint numbers onto the wood, use stencils for intricate designs, or even woodburn your own unique pattern.
4. Attaching the Clock Mechanism
Locate the center of your clock face. Carefully drill a hole large enough to accommodate the clock mechanism. Securely attach the clock mechanism to the back of your clock using screws or appropriate fasteners.
5. Installing the Clock Hands
Once the mechanism is securely attached, install the clock hands according to the manufacturer's instructions. Align the hands with the corresponding positions on the clock face.
6. Final Touches
Add any final touches, like a coat of varnish or sealant to protect your wood. You can also add a hanger to the back of your clock if you want to hang it on a wall. Remember to adjust the time on your clock and test it out before hanging it up.
Tips for Success
Ready to make your clock stand out? These tips can take your wooden clock from "good" to "wow!":
- Experiment with different wood finishes. Stain, paint, or apply a clear sealant to enhance the natural beauty of your wood.
- Get creative with your clock face. Use different colors, patterns, or even add a personal touch with a family photo or your favorite quote.
- Add embellishments. Consider adding decorative elements like knobs, metal accents, or even small wooden gears for a unique look.
- Don't be afraid to make mistakes. Woodworking is a learning process. Embrace the imperfections and let your creativity shine!
Enjoy Your Creation!
Congratulations! You've just built your very own wooden wall clock. Take a moment to admire your hard work. Hang it up proudly and enjoy the satisfaction of having created something unique and beautiful. Every time you glance at your clock, you'll be reminded of your creative spirit and the joy of DIY. Happy crafting!


